
Your Block Paving Needs This: A Pressure Washing Guide for Isle of Wight Homeowners
- Josh Clay
- Dec 23, 2025
- 5 min read
Hey there! ✨ Josh here from Isle Jet It, and let me tell you - your block paving is probably crying out for some TLC! Living here on the beautiful Isle of Wight means we get our fair share of coastal weather, salt air, and all those lovely green bits (moss and algae!) that just love to make themselves at home on our driveways and patios! 🌊
If you're staring at your block paving thinking "that used to look so much better," you're absolutely not alone! Today I'm going to walk you through everything you need to know about pressure washing your block paving properly - because trust me, there's definitely a right way and a wrong way to do it! 💪
Why Your Block Paving Gets So Grubby! 🤔
Let's be honest - our Isle of Wight weather isn't exactly kind to outdoor surfaces! Between the sea spray, autumn leaves, winter rain, and spring growth spurts, your poor block paving takes a proper battering throughout the year! ⛈️
You've probably noticed those annoying weeds popping up between the blocks, that slippery green moss creeping across the surface, and maybe even some stubborn oil stains from the car! Don't worry - it happens to the best of us! The good news? With the right approach, you can get that paving looking absolutely brilliant again! ⭐️
Getting Your Pressure Setting Spot On! 🎯
Here's where loads of people go wrong - they think "more pressure = better results!" Wrong! ❌
The golden rule for block paving is to keep your pressure between 500-1500 PSI! I know, it sounds quite technical, but stick with me! Most residential pressure washers work perfectly at around 1,500 PSI - that's your sweet spot! 🎪
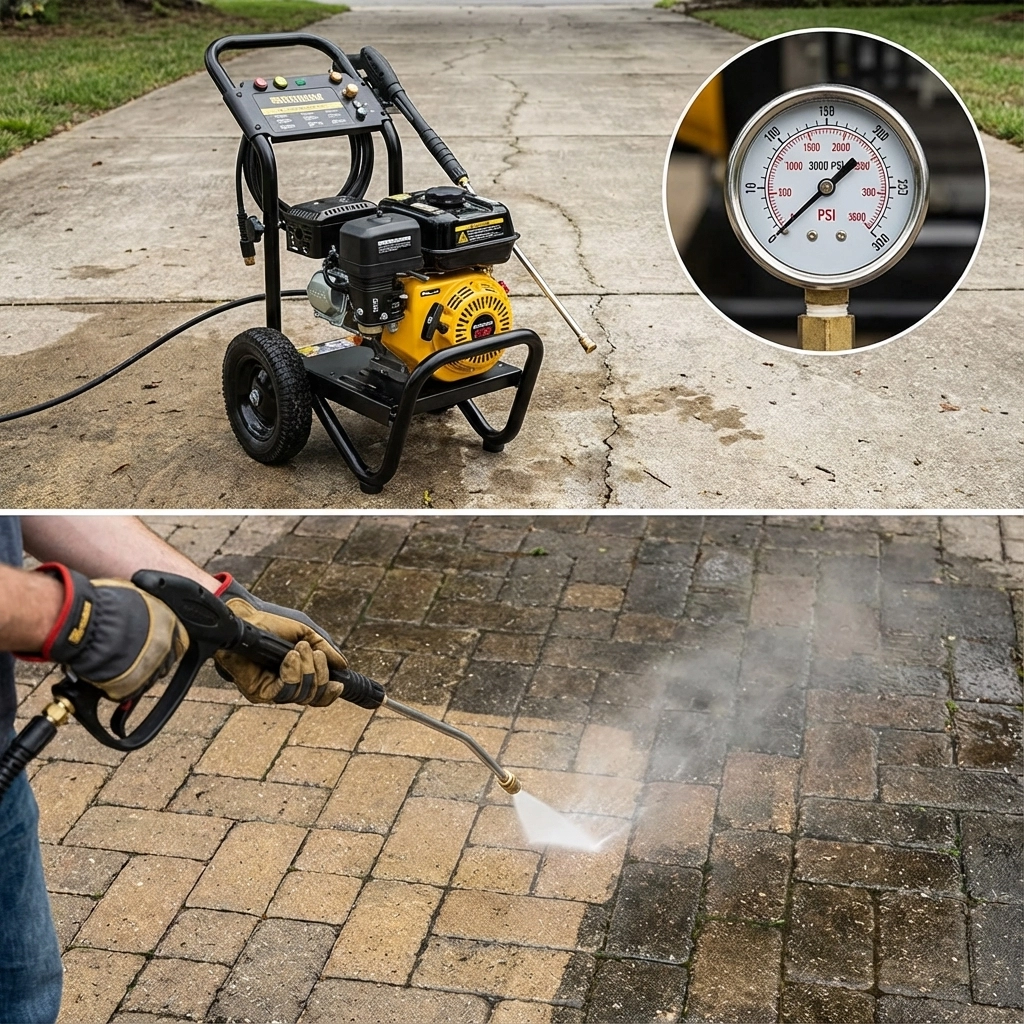
Why is this so important? Well, blast your paving with too much pressure and you'll end up with:
Cracked or chipped surfaces! 😱
Blocks shifting out of place!
All that lovely sand between your blocks getting blasted away!
Damage to any protective sealants!
Trust me, I've seen the aftermath of enthusiastic DIYers going a bit mad with industrial-strength pressure washers - it's not pretty!
If your pressure washer doesn't have adjustable settings, no worries! Just keep that nozzle at least 24 inches away from the surface and use the widest spray pattern you've got! 📏
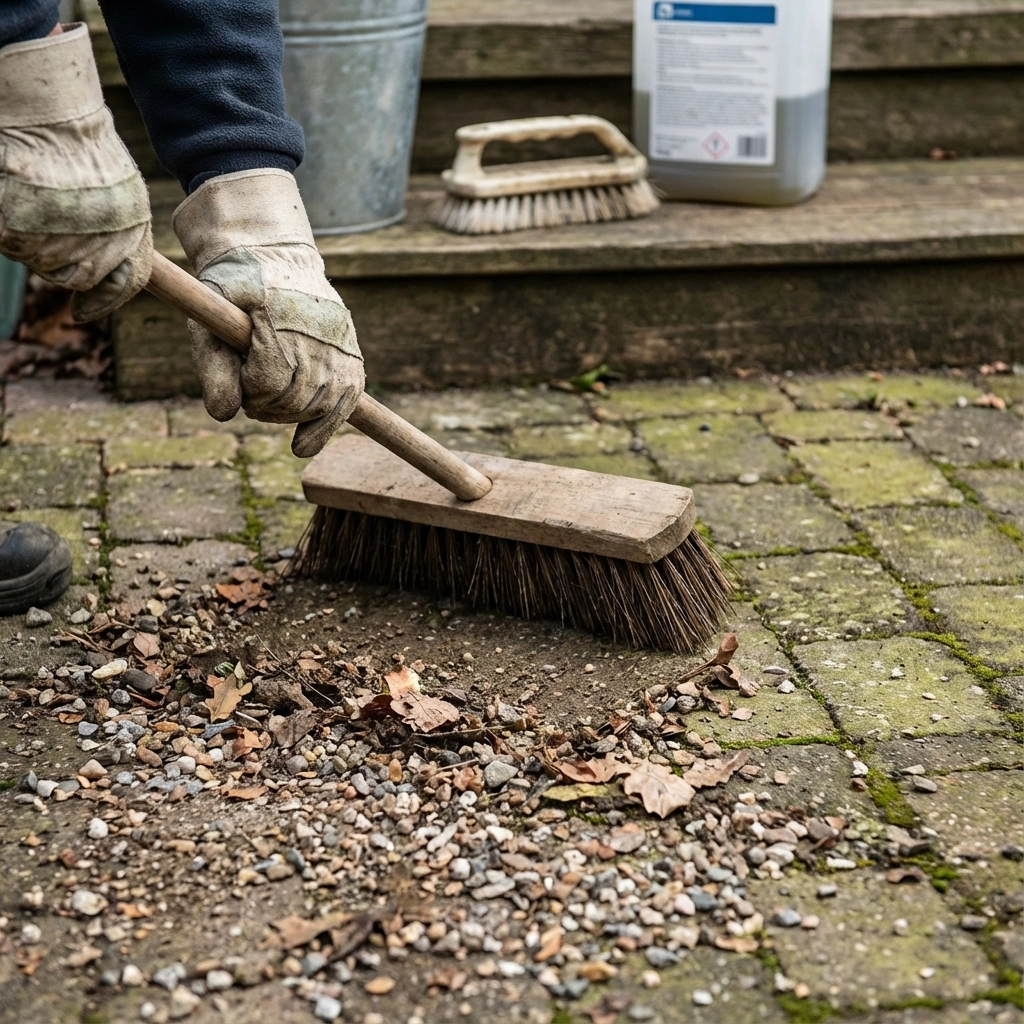
The Prep Work That Makes All The Difference! ✨
Right, before you even think about firing up that pressure washer, we need to do some prep work! This bit is absolutely crucial - skip it and you'll be kicking yourself later!
Step 1: Clear The Decks! 🧹 Grab a stiff broom and sweep away all the loose stones, dirt, leaves, and any other bits and bobs! You don't want these flying around when you start pressure washing - they can become little missiles that damage your paving!
Step 2: Weed and Moss Removal! 🌱 Get stuck in and remove as many weeds and moss patches as you can by hand! I know it's a bit tedious, but your pressure washer will work so much better on a surface that's already been cleared! Plus, you'll get much tidier results!
Step 3: Tackle Those Stains! 🛢️ Spotted any oil, grease, or other stubborn stains? Give them a pre-treatment with a suitable stain remover! Let it work its magic for a bit before you start washing - you'll be amazed at the difference it makes!
Step 4: Test First! 🔍 Always, and I mean ALWAYS, test your pressure washer on a small, hidden corner first! Every paving material is different, and you want to make sure your settings won't cause any damage!
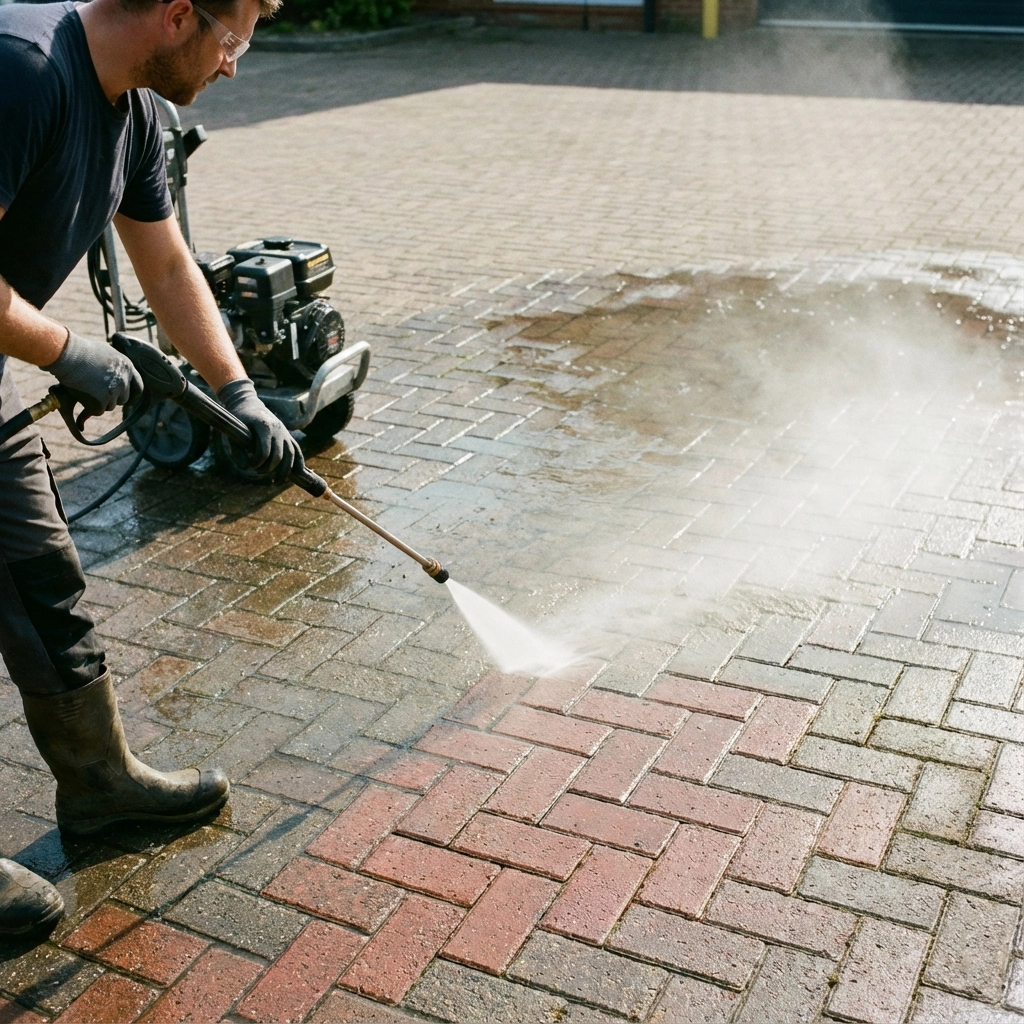
The Washing Process - Let's Do This Right! 🚿
Alright, now for the fun bit! Here's how to get your block paving sparkling without causing any damage:
Angle is Everything! 📐 Hold your pressure washer lance at about a 45-degree angle to the surface - this is absolutely key! Keep it roughly 8 inches (200mm) away from the paving! This angled approach helps protect that precious sand between your blocks!
Work Methodically! 📋 Don't just randomly spray about! Work in straight lines, moving systematically from one side to the other! Think of it like mowing the lawn - you want nice, even coverage! Take your time - this isn't a race!
Keep It Gentle! 💝 Remember, we're cleaning and rinsing, not trying to blast everything into oblivion! If you're having to really struggle to remove something, it probably needs a different approach - maybe a specialized cleaner or a bit of manual scrubbing!
Mind Your Surroundings! 🏠 Be considerate of your neighbors and surroundings! Direct that water away from buildings, cars, and next door's washing line! And if you do splash dirt onto walls or windows, give them a quick rinse down - it's just good manners! 😊
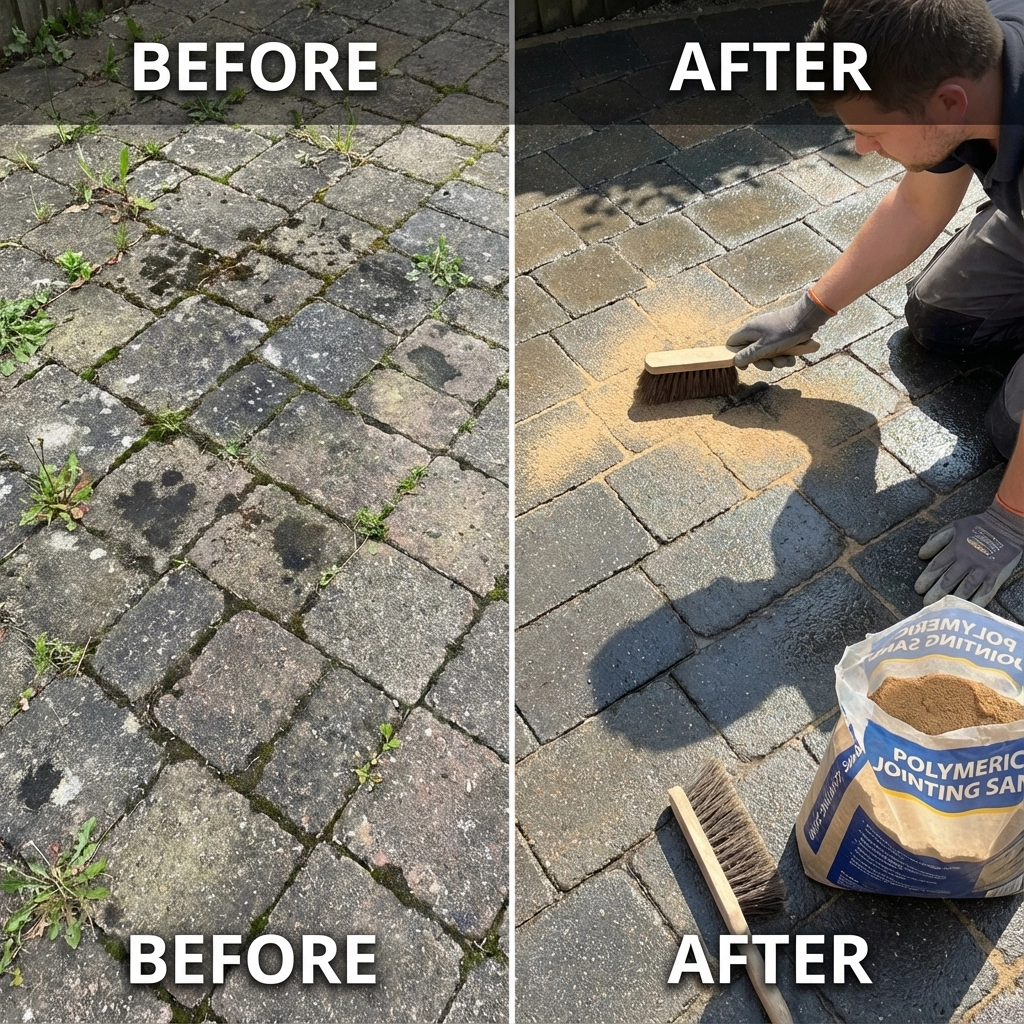
After The Wash - Don't Stop Now! 🛠️
You're nearly there, but don't pack up just yet! The aftercare is just as important as the washing itself!
Let It Dry Properly! ☀️ Give your paving time to dry completely - I know you're excited to see the results, but patience is key here! Once it's properly dry, you can assess what needs doing next!
Re-Sand Those Joints! 🏖️ Take a look at the gaps between your blocks! If any sand has been washed away (and some probably has), you'll need to top it up! Regular sand works fine, but polymeric sand is even better - it sets harder and gives better stability! Just brush it in and give it a light spray with water to activate it!
Consider Re-Sealing! 🛡️ If your paving was sealed before, you might need to reapply the sealant, especially if you had an acrylic coating! This isn't always necessary, but it's worth considering for extra protection!
Pro Tips From Years of Experience! 💡
Timing Matters! ⏰ Choose a nice, overcast day for pressure washing! Bright sunshine can cause cleaning products to dry too quickly, and you'll get better, more even results when it's not blazing hot!
Sealed Pavers Need Special Care! 🔒 Got sealed paving? Use lower pressure settings to avoid stripping away that protective coating! It's much easier to preserve what's there than to reseal everything afterwards!
New Paving Considerations! 🆕 If you've got newly laid paving (within the last year or so), don't panic if you see white staining appearing! This is called efflorescence - it's just natural salts coming to the surface! Pressure washing doesn't usually cause this, and it often sorts itself out over time!
When DIY Isn't The Answer! 🤝
Look, I love a good DIY project as much as the next person, but sometimes you need to know when to call in the professionals! If you're dealing with:
Really delicate natural stone paving! 🪨
Extensive moss and algae growth!
Stubborn stains that won't budge!
Large areas that would take you weeks to do properly!
...then it might be worth giving us a call! We've got commercial-grade equipment, years of experience, and honestly, we love what we do! Plus, we know exactly how to handle Isle of Wight's unique challenges - from that persistent coastal moss to the sand that seems to get everywhere! 🌊
Keep It Looking Great For Longer! ⭐️
Once you've got your block paving looking fantastic, here are some tips to keep it that way:
Regular sweeping prevents debris buildup! 🧹
Deal with weeds quickly before they establish! 🌿
Consider an "apply and leave" moss treatment!
Schedule regular professional deep cleans! 📅
Your block paving is an investment in your property, and with the right care, it can look absolutely stunning for years to come! Whether you tackle it yourself or call in the experts, the important thing is getting it done properly!
Remember, here at Isle Jet It, we're always happy to chat about your specific needs! Every property is different, and sometimes a quick conversation can save you time, money, and potential headaches!
Happy cleaning, and here's to getting that paving looking absolutely brilliant again! ✨🏡
Comments